
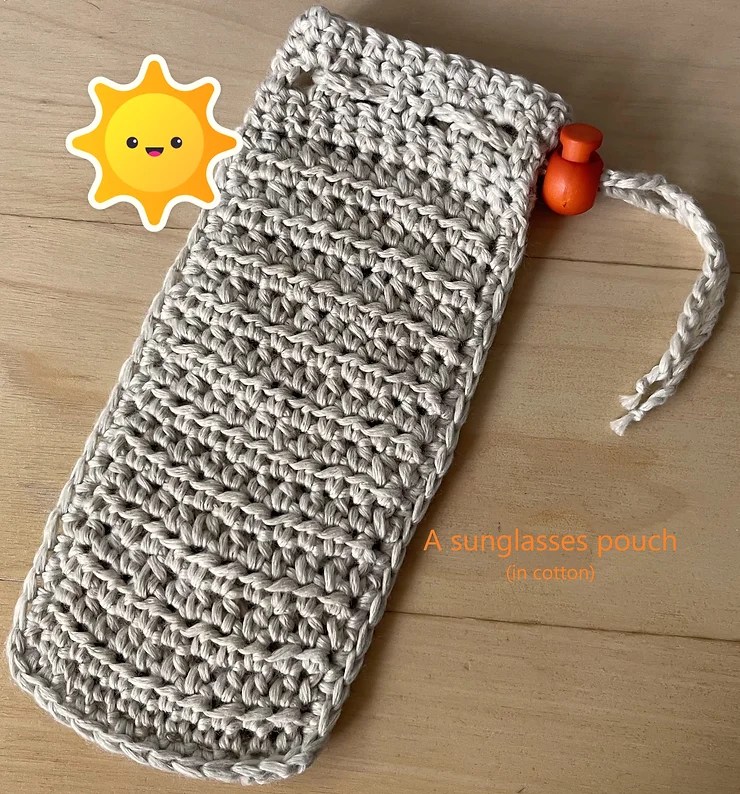
This MIGHT be the last sunglasses pouch,… we’ll see (smile).
I was on a roll using up odds and ends of yarn, and I had some Sandcastle (color) yarn leftover from another shawl project (pictured here).
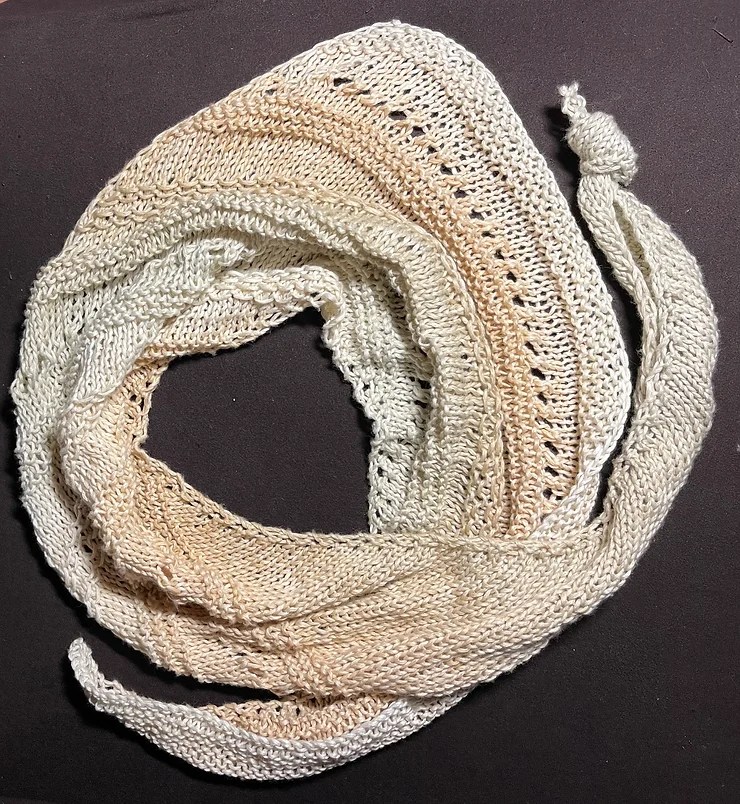
Once again this was Juniper Moon Farms “Cirrus” yarn (Color #301 – Sandcastle). The shawl I made followed the pattern “May I Borrow This, Please?” (found here on Ravelry).
Back to the sunglasses holder/pouch pattern. In honor of the BEIGE color, which is a bit more tame than the other colors, I went with a more basic stitch pattern for this sunglasses pouch: the half-double crochet stitch.
Here’s what you need to make this quick & fun item:
- Yarn: I used leftover Juniper Moon Farms “Cirrus” cotton yarn
- Crochet hook: (US) Size G (or H, depending on your tension)
- Scissors
- A darning needle
- Finishing:
- cord lock
- for THIS version, I crocheted a long chain using a crochet hook 1 size smaller than used for the main pattern. I used a G for the main pattern and an F hook for the chain.
- knot the end and thread through the Ch 1 spaces in the DC row.
- you could also use a shoelace or other cord in a color that coordinates with your yarn as in the 2 previous patterns
Pattern
- Chain (ch) 13
- Row 1: Working in the “bump” at the back of the chain, make a Single Crochet (SC) in the 2nd chain from the hook, and all the way across (12 sts); ch 1 and turn.
- here’s a quick tutorial if you need some help with that
- Row 2: HDC in the 1st stitch and continue across, placing a HDC in each stitch. At the end of the row, ch 1 and turn
- Rows 3 – 22: Repeat Row 3 until your piece measure at least 6 1/2″ (or the length you prefer for your sunglasses pouch).
- Fasten off.
- Make 2 (total)
Assembly:
- Align the 2 sides and SC around, beginning at the top LEFT corner and going down one side, across the bottom and up the other side.
- Place 2 SC in each corner to ease.
- When you get back up to the TOP, SC around the opening. When finished, join with a Slip Stitch, and Ch 1.
- SC in the next stitch, and continue around for a 2nd row of SC stitches.
- At the end of this row, Slip Stitch to the top of the Ch 1. and then Ch 3.
- Make a DC on the next stitch; ch 1 and sk 1. Repeat the pattern *1 DC in each of next 2 sts – ch 1 – skip 1 st* around, and slip stitch in the 3rd chain of that starting “chain 3“.
- Chain 1 and make a final row of SC around, ending with a Sl St to the beginning chain 1.
- Thread the cord between the SC/DC spaces in the last/top row of the flat panel, add the cord locks, knot ends,
Enjoy!
(C) 2023 Stitch ‘n Dish (now Fiber Harmony)
