
I like to have little gifts at the ready so I can take one along if I am meeting someone for coffee that I haven’t seen in some time, or having lunch with someone who is going through some things and could use a reason to smile, or to give a small gift for no particular reason other than I feel compelled to do so.
This piece works up SO quickly, and I think it’s delightful. Here’s how I made mine, pictured in this post, but I am certain there are 50 more ways to make this special.
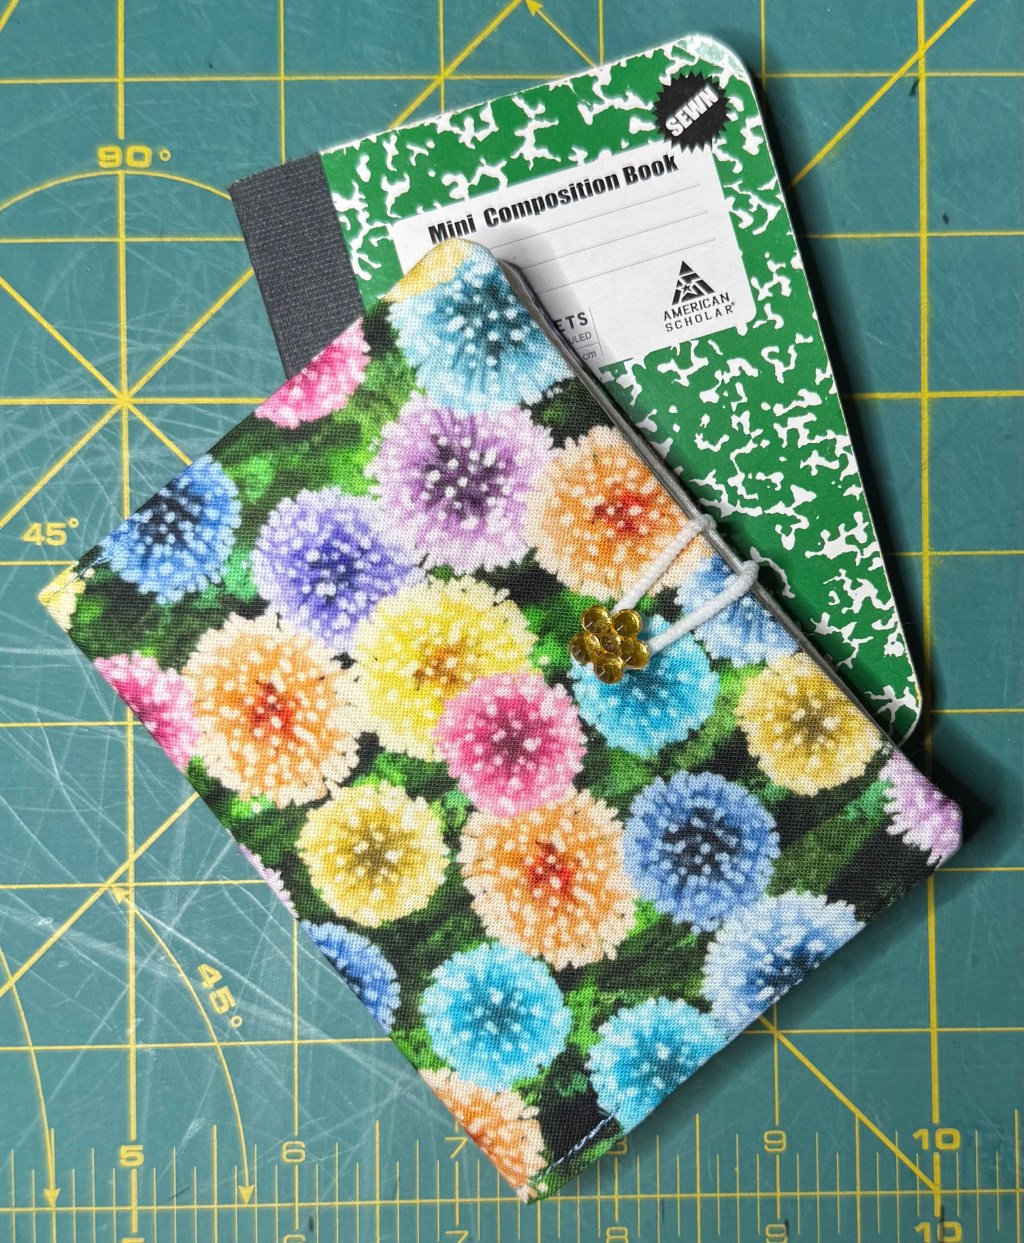
I purchase these mini composition notebooks at dollar stores. In Dollar Tree stores, you can often find these in packs of 4 for $1.25. Wherever you find them, next time grab some so you can make a few “just because” gifts.
Directions
I use parchment paper to make patterns, but any piece of paper will work.
Open the notebook and lay it out on the pattern paper, pages up and covers down on the paper. It’s important that it be OPEN for this step, and that we don’t measure it closed and simply double it.
Decide on your seam allowance. This will depend on what you want to put underneath the fabric covering. After my experience with the larger ones, I decided to stick with simple fusible interfacing for these minis, so I chose a seam allowance of 3/8″.
- there’s no right or wrong here; do what works for you
Cut out this piece. I also like to write what it is on the pattern so when I find it 3 years later, I know what it is:
- Mini Notebook Cover: cut 1 for outside fabric; cut 1 for lining
Cut out fabric for the outside and the lining using this template/pattern. Apply interfacing to each piece.
Next you will measure for the “flaps” which are the fold-over pieces that allow you to slip the front and back covers of the notebooks into the fabric cover. Again, there’s no hard and fast rule on the width of these, but from experience I will recommend that they not be TOO deep or you have to mangle either the front or back notebook cover to get it all the way in. My general approach is to make this piece around 2/3 – 3/4 of the width across the flap.
On my minis, the front and back covers/flaps are about 3″ across. I made the one pictured below as 2.5″ when finished, although next time I will likely dial that back to 2″. Also keep in mind that they need to be as tall as the outside and lining cuts. I posted a general cutting guide at the bottom of this post.
- NOTE: it’s not a to-scale pattern; just a GUIDE for cutting out the pieces since the measurement depends on the notebook size.
Apply interfacing to each inside flap piece.
On each flap piece, fold over one long edge and press; then top stitch as close to the edge as you can. You want to minimize any possibility of the edge “curling” as you use it with subsequent notebooks (see photos at the bottom of the post).
Now it’s time to layer the pieces for stitching around.
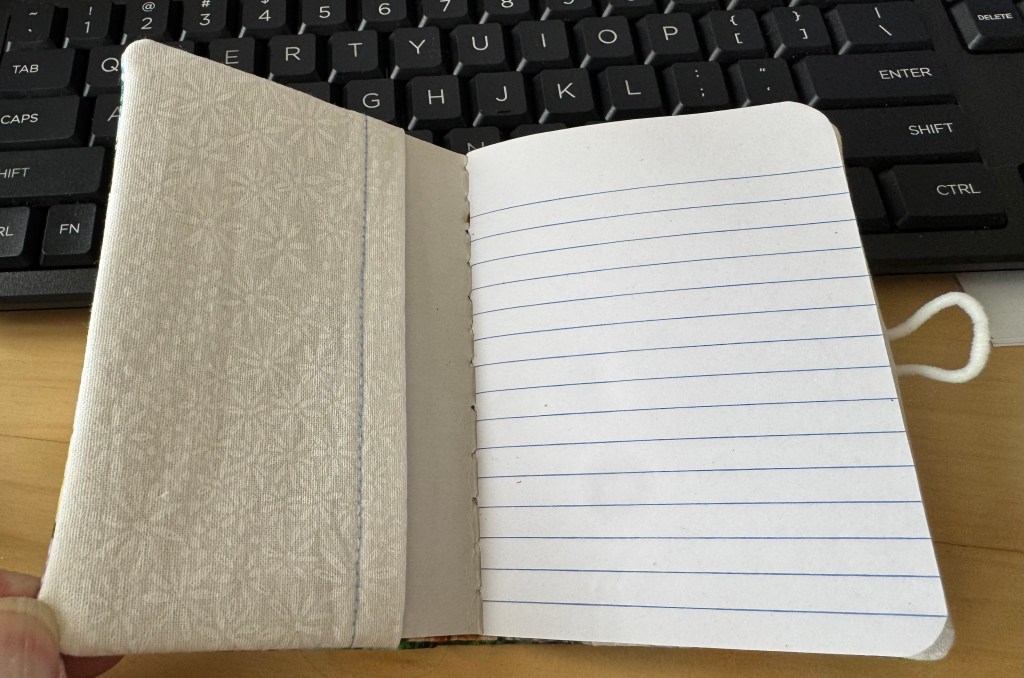
Lay the OUTSIDE piece down with the RIGHT SIDE up. Lay the flap pieces right-sides DOWN and with their unfinished long edge flush with the edge of the outside piece. Lastly, lay the LINING piece down, WRONG SIDE up.
If you would like a closure, lay a loop of elastic (I used elastic from COVID mask-making days) between the bottom layer (outside) and flap piece. Make sure that the ENDS of the elastic loop are visible outside of the edge of the piece you are going to stitch. The looped portion should be tucked in between the layers of fabric.
Pin or clip, and mark a section to leave open for turning. I leave a section at the bottom open, between the edges of the flaps. This option leaves the least number of layers to have to fold and top stitch (it’s a much neater finish).
Stitch around using your chosen seam allowance. If you’re not sure, less is more. What I mean here is that you can insert a notebook into a cover if the seam allowance was SMALLER than needed, but not if the seam allowance was DEEPER than needed. The GOOD NEWS is that these are low stakes projects that use scraps, so we have some leeway for mistakes and learning along the way.
Clip the corners, taking care not to cut through the stitching line, and I always like to “thin” about a 1/2″ from the corner to make the turning as neat as possible. By “thinning” I refer to cutting the seam allowance back to around 1/2 its width just before and after each corner point.
Turn the piece, push out each corner using a knitting needle or similar item. Press, and then pin and stitch the opening closed. I also top stitch the opposite side to match.
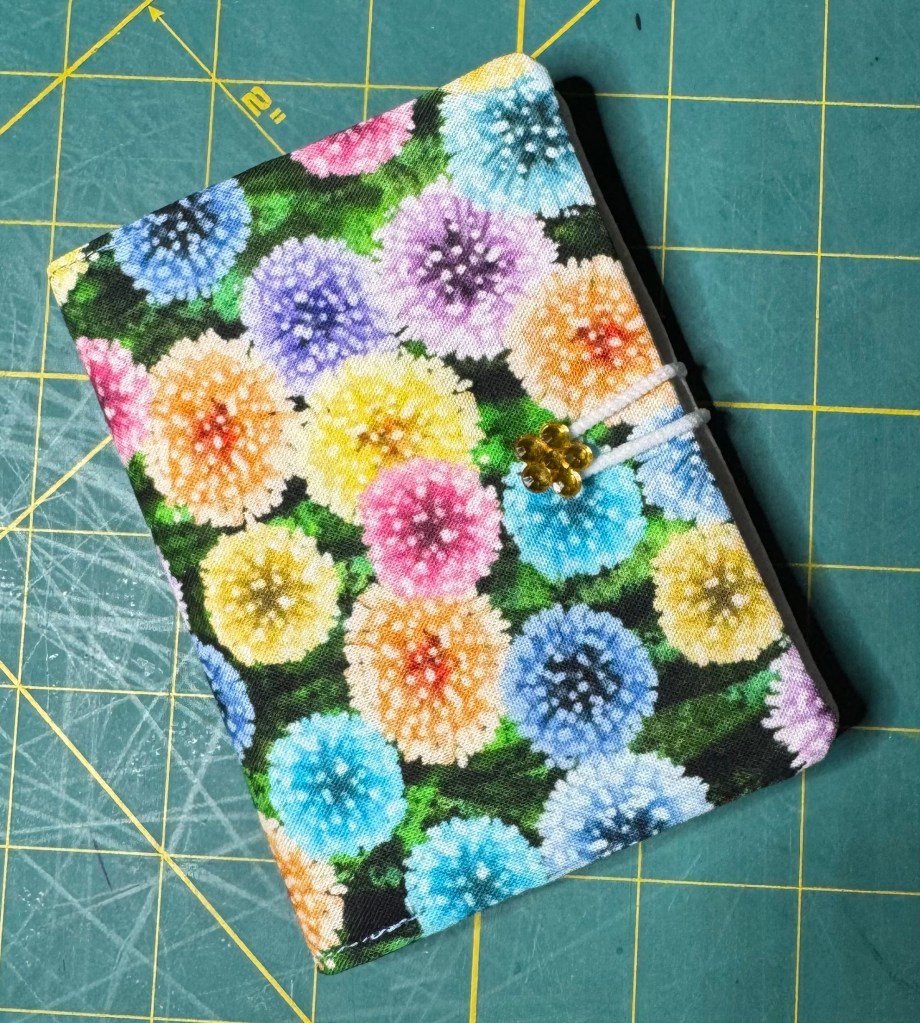
Find a button to loop the elastic around, hand the stitch button into place, and voila!
On my next one, I may make a fabric loop, and use a plastic snap. If that works, I’ll post a photo and update the steps to include that option.
Whether we are making a gift to give, or making one for ourselves, these are fun, quick, and for those who sew – the materials are usually readily available in our stash.
Here’s to a Winter season of stitching fun!
(C) 2026 Fiber Harmony / Stitch ‘n Dish
